


Quick Summary
This guide explains the specialized process of creating curved marble structures, transforming rigid stone into flowing art. The key fabrication steps are:
- Precision Undercutting: Creating angled joints for seamless connections
- Trial Assembly: Dry-fitting pieces before final bonding
- Chemical Bonding: Using specialized epoxy for strong, invisible joints
- Two-Stage Finishing: Rough grinding for shaping, followed by water grinding for mirror polishing
The process solves common challenges like visible seams and structural fragility, combining engineering precision with craftsmanship to create stunning curved marble features.
Creating curved stone(Marble Curving) structures is the pinnacle of masonry. It transforms a rigid material into fluid art. This guide explores the critical fabrication lifecycle: precise undercutting to ensure seamless joints, trial assembly for fit verification, chemical bonding and gluing, followed by mechanical profiling. Finally, we discuss the transition from rough grinding to the mirror-finish of water grinding. Whether you are an architect or a fabricator, understanding these steps ensures structural integrity and aesthetic perfection.

2. Introduction: Bending the Unbendable
Imagine walking into a grand hotel lobby. Your eye is immediately drawn to a spiralling staircase that looks as though it was poured from liquid cream, yet it is solid marble. It creates an immediate sense of luxury and permanence.
However, anyone in the stone industry knows that marble does not like to bend. It is stubborn, heavy, and unforgiving. One wrong calculation during the undercutting phase, and you don’t just have a gap—you have an expensive paperweight.
Creating these curves isn’t magic; it is a rigorous sequence of engineering and artistry(Marble Curving). It requires a steady hand for gluing, a keen eye for profiling, and the patience of a saint during water grinding. Let’s dive into how we turn stone-cold blocks into flowing masterpieces without losing our marbles (pun intended).
3. The Three Great Pains of Curved Stone Fabrication
Before we discuss the “how,” we must address the “why.” Why is this process so notoriously difficult? Here are the top three pain points fabricators and clients face(Marble Curving):
A. The “V-Groove” Nightmare
The most common issue in curved marble work is visible seams. If the undercutting angle is even a fraction of a degree off, the pieces will not mate flush. This results in unsightly grout lines that ruin the illusion of a solid curve.
B. Structural Fragility
Curved pieces often require laminating or stacking. Poor bonding or inadequate adhesive coverage leads to delamination. A cracked curve is significantly harder to repair than a flat tile because gravity and tension work against you.
C. The “Orange Peel” Effect
Achieving a consistent shine on a curved surface is exponentially harder than on a flat slab. Inconsistent rough grinding leaves undulations, and if the water grinding isn’t uniform, the reflection looks distorted—like the skin of an orange rather than a mirror.
4. Solutions: The Trinity of Precision
To overcome these challenges, we adhere to a strict protocol.
Step 1: Precision Undercutting and Preparation
The secret to a seamless curve lies in the preparation. Undercutting involves cutting the back edge of the stone slab at an angle (usually slightly acute) to allow for a tight exterior joint while leaving room for adhesive at the back.
- Action: Use a 5-axis CNC bridge saw for the initial cuts.
- Tip: Always clean the joint surfaces with acetone before any adhesive touches them. Dust is the enemy of a strong bond.
Step 2: Trial Assembly and Bonding
Never apply glue until you have done a dry run. Trial assembly is the “measure twice, cut once” of the curving world. Clamp the pieces together dry to check the radius and the seam tightness. Once satisfied, we move to gluing.
- The Mix: We use high-grade epoxy mixed with stone dust or colouring paste that matches the marble‘s base tone perfectly.
- The Application: Apply the adhesive to both surfaces (buttering) to ensure no air pockets remain.
Step 3: Profiling and Grinding
Once the bonding agents have cured, the stone acts as a single unit. Now comes profiling—shapin
g the raw, blocky edges into a smooth curve. This is often done with bullnose bits or profile whe
els.
- Rough Grinding: This removes the excess glue and shapes the stone to the final radius. It is aggressive and dusty work.
- Water Grinding: This is the refinement stage. Using a continuous flow of water keepsthe stone cool (preventing burns) and clears the slurry, allowing the polisher to see the true surface.
5. Case Study: The Floating Calacatta Staircase
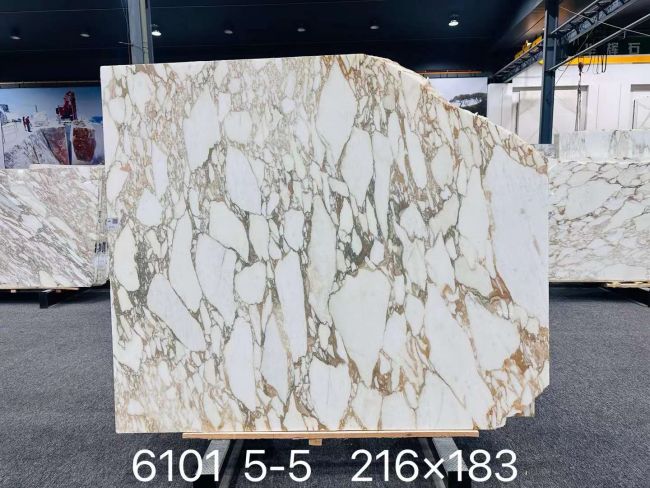
We were commissioned to fabricate a helical staircase for a private villa, using premium Calacatta Gold marble.
The Challenge: The client demanded continuous vein matching (book-matching) across the curved risers and treads. Unlike flat walls, maintaining vein alignment on a twisting 3D surface is notoriously difficult.
The Execution:
- Digital Mapping: We scanned the slabs and digitally projected the cut lines to ensure the gold veins would align perfectly at every joint.
- Undercutting: Precise mitre cuts were made to allow the treads to wrap seamlessly around the steel spine structure.
- Trial Assembly: We dry-laid the entire staircase in the workshop. This step was crucial to verify the vein flow before any permanent gluing took place.
- Bonding: A clear, flowing epoxy was used for structural bonding, ensuring the white stone remained stain-free.
- Profiling & Finish: The nosing details underwent profiling to create a soft bullnose, followed by rough grinding to smooth the transition. Finally, water grinding achieved a mirror polish that highlighted the gold inclusions without overheating the delicate white stone.
The Result: A stunning, monolithic structure where the grey and gold veins appeared to flow like a waterfall down the stairs, with no visible interruptions.
6. Analysis: Rough Grinding vs. Water Grinding
Understanding the distinction between these two grinding phases is vital for quality control.
| Feature | Rough Grinding | Water Grinding |
|---|---|---|
| Objective | Material removal and shaping. | Surface refinement and polishing. |
| Tooling | Diamond cup wheels, 30-60 grit pads. | Resin-bond diamond pads, 100-3000 grit. |
| Environment | Usually dry (with extraction) or wet. | Always wet to prevent heat damage. |
| Risk Factor | High: Can gouge the stone shape. | Medium: Can cause “burn” marks if dry. |
| Visual Result | Dull, scratched, opaque. | Glossy, reflective, vibrant colour. |
7. Market Trends in Stone Curving(Marble Curving)
The industry is moving away from solid block carving (which wastes 80% of the material) toward laminated curving techniques.
- Honeycomb Backing: Thin marble veneers (3-5mm) are bonded to aluminium honeycomb panels. This makes the curved panels lightweight and flexible enough to bend without complex undercutting.
- Robotic Profiling: 7-axis robotic arms are replacing manual rough grinding, allowing for mathematically perfect curves that human hands struggle to replicate over large distances.
- UV-Stable Glues: Modern bonding agents are now UV stable, meaning the glue lines won’t yellow over time if the curved feature is near a window.

8. Style and Usage Advice
Where should you use curved marble?
- Columns: Cladding structural steel columns in curved stone softens the industrial feel of a space.
- Archways: A profiling architrave adds a Romanesque grandeur to doorways.
- Bathrooms: Curved vanity units prevent hip-bruising corners in tight spaces and look incredibly chic.
Pro Tip: For high-traffic areas, choose a honed finish (stopped at around 400 grit during water grinding) rather than polished. It hides scratches and fingerprints much better on curved surfaces.
9. Conclusion
Mastering marble curving is a testament to a fabricator’s skill. It requires a seamless transition through the stages of undercutting, trial assembly, bonding, rough grinding, and finally, water grinding. When executed correctly, the stone loses its visual weight and becomes a flowing, organic element of the architecture.
At H Century Star, we combine traditional craftsmanship with modern CNC precision to deliver stone solutions that defy expectations.
Ready to add a curve to your next project? Contact our design team today to discuss your specifications.
Curved Marble Fabrication: Precision Engineering for Seamless Stone
Transforming rigid marble into fluid curves requires specialized techniques that blend engineering precision with craftsmanship.
• Precision CNC undercutting
• Dry trial assembly
• Epoxy bonding
• Water grinding polish
This method ensures structural integrity while creating the illusion of solid, flowing stone – perfect for staircases, arches, and luxury features where visual impact matters most.
10. FAQ
Q1: How long does the gluing process take to cure?
A: It depends on the adhesive. Standard epoxy used in bonding usually requires 12 to 24 hours to fully cure before we can begin rough grinding. Rapid-set glues exist but are riskier for complex curves.
Q2: Can any marble be curved?
A: Most can be fabricated into curves, but brittle stones (like Emperador Dark) require careful backing and netting during the undercutting process to prevent crumbling.
Q3: What is the difference between dry grinding and water grinding?
A: Dry grinding is aggressive and creates dust; it is used for shaping. Water grinding uses water as a lubricant and coolant, which is essential for achieving a high polish without “burning” the stone.
Q4: Why is trial assembly necessary?
A: Trial assembly allows us to spot microscopic misalignments. Once the gluing process starts, you cannot go back. It is our safety net.
Q5: Is curved marble expensive?
A: Yes, generally more so than flat work due to the labor-intensive profiling and waste material involved in undercutting.
References
Internal Resources:
External Authorities:
- Natural Stone Institute (NSI) – Industry standards for stone fabrication.
- The Stone Federation Great Britain – Best practices for stone masonry in the UK