


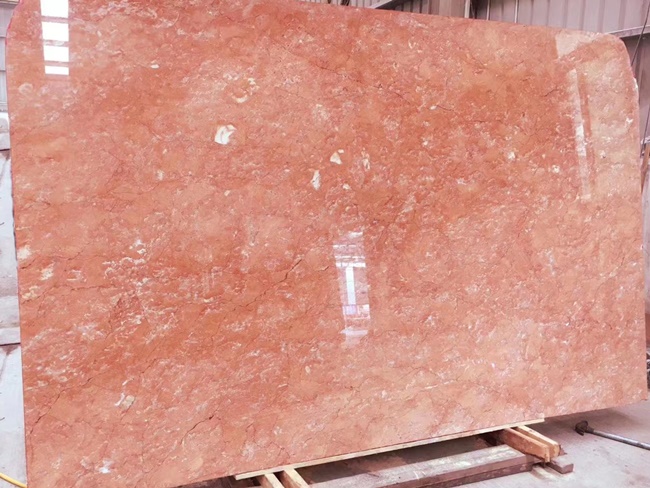
1. Why “Texture Matching” Is the Soul of Stone
Every vein in marble is a snapshot of billions of years of crustal movement. If haphazardly cut and laid without order, even the most precious stone can become nothing more than “overpriced tiles.” Only by treating texture matching as a continuous painting and recreating it can a wall imbue it with depth, emotion, and storytelling, truly achieving the goal of “a wall is a painting.”


2. First, distinguish between three basic patterns: matching, tracking, and random patterns.

Texture matching: Two panels are mirror-like, creating a V-shaped or radial pattern. This creates a sense of drama and is suitable for luxurious and ceremonial spaces.
tracking: Numbering follows the original cross-section, extending “ridges” or “rivers” from floor to ceiling, creating an intangible elongation of the space. This pattern is suitable for modern and minimalist spaces. Random Grain: Seemingly random, it’s actually chaotic yet organized. Using brightness, color temperature, and direction to create an “invisible grid” creates a natural and relaxed atmosphere, a true test of layout skills.
3. 5 Keys to Perfect Texture Matching (Designer’s Secret Process)
Key 1: Material Selection: Lock in one “master” at a time
• Go to site to select rough material, trace the grain direction on 1:1 kraft paper with chalk, and take photos and number them.
• Calculate the required number of panels by dividing the width of the TV wall by the height of the panel. Add an additional 20% for fine-tuning symmetry.

Key 2: Scanning + Layout: Bringing the Mining to the Computer
• Use the 2025 version of “StoneScan Pro” to scan a single 2.4 m × 1.6 m panel in high definition, achieving a resolution of 600 dpi. • Perform a “virtual grain alignment” in the software first—generating three A/B/C plans for grain alignment, grain tracking, and random grain. Generate a 1:1 color spray film with one click, and apply it to the wall on-site for light and shadow comparison.
Key ③: Numbered Cutting: Precise like a puzzle
• Use a five-axis bridge cutting machine to cut according to the layout file. Laser-mark a QR code on the edge of each panel; scan the code to display the installation coordinates.
• Mirror cutting is required for grain alignment: After cutting panel A, rotate panel B 180° before cutting to ensure grain symmetry.
Key ④: Pre-layout: “Hang” the pattern in the factory first
• Lay out the pattern on the factory floor at a 1:1 scale, arranging each panel according to its number. On-site confirmation by the designer, client, and photographer is conducted.

• Use a DSLR to capture a panoramic view, then overlay it onto the living room rendering using Photoshop. Preview the reflections of the TV, light strips, and furniture on the grain to avoid “breaking the TV frame.” Key ⑤ On-site Installation: Three Laser Scales + Two-Component Structural Adhesive
• Use a laser level to create a “cross baseline” to ensure the first reference plate is level and vertical;
• First, apply epoxy primer to the wall, then adhere with A+B two-component epoxy structural adhesive to ensure earthquake resistance and prevent hollowing;
• After completing every three panels, use a 2-meter straightedge to check the flatness to ≤0.5 mm. Then, fill the gaps with epoxy colored sand of the same color to achieve a truly seamless finish.
4. Texture Matching Advanced Techniques: 4-panel, 6-panel, and Full-Length Continuous Pattern


• 4-panel Radial: With the TV’s center as the center, four panels are arranged in an “X” shape. Suitable for background walls over 3 meters wide.
• 6-panel Snowflake: Six panels are rotated 60° from the center outward, creating a pattern resembling snowflake crystals. This technique requires precise seam control using a CNC water jet.
• Full-Length Continuous Pattern: Three 2.4-meter panels are joined to create a 7.2-meter x 2.4-meter “full painting.” Transport requires an A-shaped wooden frame and a crane through the window.
5. Texture Matching Lighting and Furniture: Bringing Texture to Life
• Light Strips: Create 2700K reflective troughs 80mm from the wall. The light sweeps across the embossed pattern, creating a silky sheen.
• TVs: For TVs 65 inches and larger, the black frame absorbs stray patterns, allowing the “painting” to shine more clearly.
• Furniture: Use a solid matte finish (warm white or dark brown) to avoid competing with the stone.
6. Texture Matching Common Failures and First Aids

Failure 1: 3mm misalignment of the grain, resulting in a cut in the TV frame.
First Aid: Use 0.3mm stainless steel molding to create a “false seam” on-site, concealing the misalignment and adding depth.
Failure 2: Color banding appears when tracking the grain.
First Aid: Wet-sand with 3000# refurbishing film twice, then crystallize the entire surface. This can reduce color variation by 70%.
Failure 3: Random grains appear dirty.
First Aid: Use a matte 15° finish with a nano-fouling agent to minimize fingerprints and enhance the sense of luxury.
7. Texture Matching Conclusion: A Wall Texture Matching, a Million-Year-Old Painting
When the lights come on, the texture undulates along the rock veins, as if folding distant mountains, seas of clouds, and waterfalls into the living room. The significance of this extreme interplay isn’t a show of skill, but rather a dialogue between natural art and human emotions: you see mountain ridges, he sees ocean waves; children see dinosaurs, elders see auspicious clouds.
Remember: Choose a master piece with a story, use five keys to disassemble it into puzzle pieces, and then let the texture “grow” on the wall into a continuous painting. At that moment, you truly “hang” a billion years of time home.