



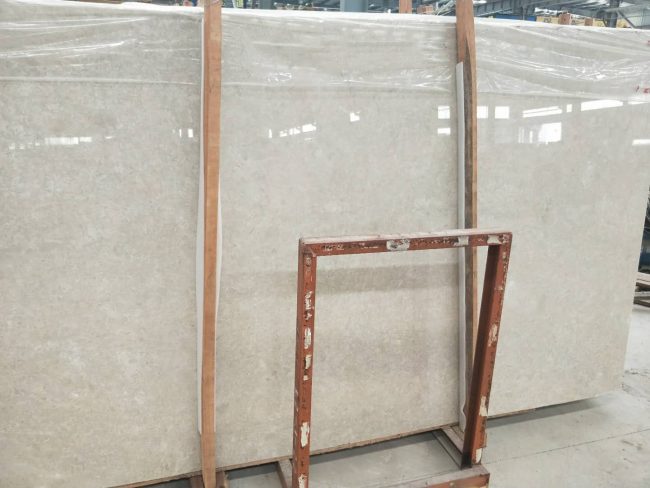
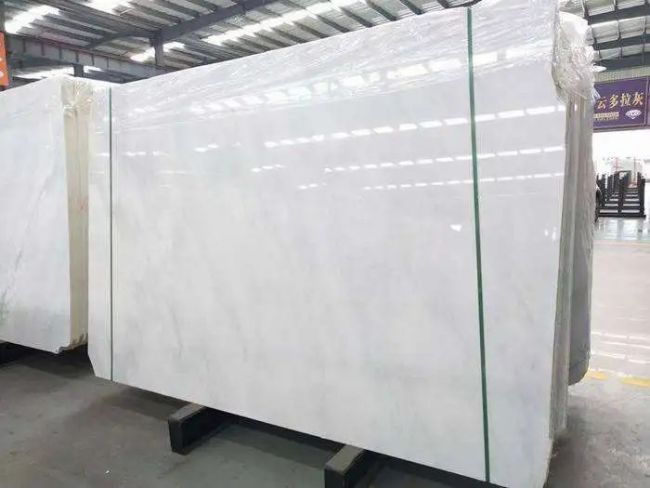
In architectural decoration, stone floor construction is really popular since it is rather beautiful and long-lasting. From luxury homes to high-end hotels, from business centres to public buildings, from stone flooring may provide indoor environments a unique texture and artistic mood. Still, decent stone floor construction is not an easy task. There are several links involved, each with specific process demands and issues. This article will go over 10 common stone floor designs’ techniques and fundamental concepts in great detail so allowing construction professionals to accurately grasp the building specifications, guarantee the construction quality, and create strong, beautiful and generous stone floorings.


Common and important architectural decoration project is indoor ordinary floor stone building. The construction quality of the floor directly relates to its attractiveness, lifetime, and serviceability. The building process comprises in preparation, line marking and number checking, trial assembly and base treatment, laying of bonding layer, laying of stone floor, seam opening and glue filling, and crystal surface treatment. To increase the bonding force in the preparation stage, six-sided protection treatment has to be carried out; the mesh fabric behind the marble has to be taken off; and the back of the stone has to be roughened. The stone location should be exactly located in line with the design drawings all through the marking and numbering process; consequently, the number should be confirmed to ensure proper placing. The base should be cleaned and brushed with ordinary cement slurry; a trial assembly should be carried out to check the splicing effect during the base treatment. Laying the bonding layer calls for using a prescribed ratio cement mortar and a particular adhesive for stone floor. Arrange the stones according to count; additionally, take into account the flatness and splicing space.

To beautify the seam opening and glue filling stages, a specific adhesive for stone floor is utilised to change the hue and fill the glue. At last, the crystal surface treatment is done to raise the stone’s wear resistance and brightness. The fundamental concepts are waterproofing treatment and adhesive choice. Before paving, kitchen and bathroom stones have to pass the water storage test; flexible waterproof coatings should be applied and satisfy thickness specifications to guarantee the sealing of the waterproof layer. Before the waterproof coating dries, totally forbidden are water storage tests. Should problems develop, they have to be fixed once more. The height of the wall waterproof coating in the wet and dry areas of the bathroom and kitchen has clear requirements at the same time. About adhesive selection, light-colored stone should use a particular adhesive for white stone floor, and a layer of adhesive should be scraped before paving the stone floor surface layer, and subsequently laid after drying to improve the bonding force.

Floor drains are a must for interior design since their construction quality directly affects the dryness of the indoor environment and their smoothness. The building procedure covers ground slope, floor drain installation, drainage pipe installation, floor drain positioning. While looking for it, the floor drain should be placed close to the sewage pipe; the ground plan and field layout should be developed ahead of times. After the drainage pipe is put in place, set a water trap and ensure the calibre meets the drainage flow requirements. To facilitate good drainage, the ground slope rate should be 0.3% to 0.5%. Dense filling the surrounding mortar will help to ensure a strong connection during floor drain construction. The key components are connection of drainage pipes, terrace treatment, and single space. Arranging several floor drains in spaces covering more than 15 square meters helps to maximise drainage. In should the building lack height difference, it is advisable to dig a trench on the terrace to prevent rainwater accumulation. The floor drain model enables one to determine the height of the drainage pipe outlet such that water leakage is halted and a tight connection is guaranteed.


Apart from waterproof purposes, the stone floor structure in the shower area should consider aesthetic impact. The building procedure comprises in preparation, line marking and pre-planting of flange steel bars, flange moulding and pouring, waterproofing, laying of bonding layer, laying of stone floor, grouting and crystal surface treatment. During preparation, the base has to be cleaned and assured to be level. Following design drawing recommendations will help to guarantee that the flange steel bar pre-planting stage follows. While the flange moulding and pouring is under way, fine stone concrete should be dumped according to the roughening process. The waterproofing method depends on unified waterproofing of the ground and the flange. Lay cement mortar after brushing the bonding layer made from cement slurry. Laying the stones, use a specific glue made for stone laying. The crystal surface is treated at a step of grouting and the splicing gaps are grouted. Important components are water-retaining strip building, trench width, and wet pavement method. In water retention strip construction in conformity with design criteria, reverse slope treatment and pre-planted steel bars with stoppers should be followed. The floor drain rules will enable one to choose the trench width such that perfect drainage is guaranteed. Laying shower room stones calls for the use of wet paving technology to ensure strong bonding of the stone floor and the base.

Kitchen and bathroom door covers are based on waterproof construction; consequently, their decoration significantly affects the dryness of the indoor environment and the service life of the door cover. Part of the construction procedure are base treatment, waterproof treatment, and three-proof treatment. About the base, the door frame has to be cleaned and the surface has to be perfect. In the waterproof treatment step, the root of the door frame base plate is filled with waterproof glue about 20mm apart from the threshold stone floor surface. The door frame foundation has to be treated with fire, corrosion and moisture during the three-proof treatment. Important elements address waterproof glue and three-proof treatment. The basis of the door frame base plate is waterproof glue; reliable materials are selected, packed and compressed exactly in compliance with building regulations. The fireproof, anti-corrosion, moisture-proof treatment of the door frame base determines both effective extension of the service life of the door frame and avoidance of deformation, mildew and other problems originating from a humid environment.
Apart from the steps’ look, stair floor stone finishing solves users’ safety concern. Part of the construction are preparation, marking and checking numbers, trial assembly and foundation treatment, laying the bonding layer, laying stones, grouting and crystal surface treatment. In preparation, the surface has to be level and the base has to be cleaned. The lines should be marked and the stone floor counts should be confirmed in the marking and verifying numbering stage using the design drawings’ standards. While base treatment, trial assembly should be done to assess the splicing effect and clean the base with basic cement slurry. Apply especially adhesive for stone floor and lay the bonding layer in a designated ratio using cement mortar. Laying stones should be done numerically, so consider the flatness and splicing gaps. The grouting and crystal surface treatment process handles the splicing gaps and crystal surface treatment. Important elements are the dark stone and anti-slip strip construction. Construction of the anti-slip strips must meet design standards to ensure the anti-slip effect of the stairs. Dark stone ties with a certain ratio using a cement mortar to ensure the close bonding between the stone floor and the base.


Usually utilised in countertops and other areas, the thicker border of the stone aims to increase the countertop’s firmness and beauty. The building process consists in preparation, cutting and bonding. For cutting to ensure that the texture and colour of the thickened edge match the countertop, it is imperative to choose the stone floor of the same block as the countertop in the preparation step. Cut from the rear to the top and bond the back to the rear throughout the cutting and bonding operation to ensure that the joints are dense and without gaps. Apart from strong bonding, colour and texture define the conspicuous characteristics. To guarantee consistency of texture and colour, the thicker strips and countertop should be cut from the same block, therefore ensuring the beauty of the colour and texture of the stone. A reliable quality glue must be selected and the operation must be carried out strictly in line with the building requirements if strong bonding throughout the bonding process is to be guaranteed.
The closing of the carpet and skirting is a fundamental part of interior design; hence, the construction quality of these parts directly affects the complete image of interior design. Part of the building procedure consists in base treatment, line drawing and positioning, carpet cutting, laying pads, laying carpets and thorough processing. Before handling the base, ground needs to be cleaned and the surface needs to be level. To exactly determine the carpet laying position and skirting installation position, line drawing, square fitting, grid division and positioning should be done in the line drawing and positioning stage. The carpet should be trimmed according to design guidelines to ensure its size is exact. Make sure the pad lays flat to prevent creases or movement of the carpet. Placing the carpet should make sure the surface is level and the joints are closed. To ensure attractiveness, the junction of the carpet and the skirting is handled in the complete processing level. Main ideas are ground levelling, skirting gaps, environmental preservation, and fire avoidance. The carpet floor needs to be level using cement mortar; it cannot be installed until the carpet is completely dry. The skirting should start with a spacing of 8 to 10 mm; this will vary depending on the thickness of the carpet. The carpet pad has to meet criteria for indoor environmental protection and fire avoidance.

The choice of floor is a crucial element of interior design; consequently, the comfort degree and service lifespan of the wooden floor directly depend on its construction quality. Part of the building procedure are foundation cleaning, elevation positioning, slurry treatment, fine stone floor concrete pouring, installation of a moisture-proof membrane and a wooden floor. While building the foundation, ground must be cleaned and the surface must be level. The elevation has to be determined and positioned during the elevation placement stage to ensure the flatness of wooden floor laying. The adhesion between the ground and the base layer is enhanced by slurry treatment. While it is still being used, fine stone floor concrete is poured and levelled. Laying moisture-proof membrane is done to stop moisture from getting into the wooden floor. Solid wooden floor is laid to guarantee that there are no gaps at the joints and that the surface of the wooden floor is flat. Important aspects include ground levelling and moisture-proof preparation. The ground cannot be laid until it reaches a designated degree of dryness; once it is levelled, the flatness must satisfy the relevant national criteria. To stop moisture from getting into the hardwood floor, a plastic moisture-proof film should be placed on the building floor and the interfaces should be overlapped and taped while laying the foundation board.
An important component of interior design is the junction between the floor wood floor and the stone; hence, the construction quality of this junction directly influences the whole effect of interior design. A 3mm expansion joint should be reserved at the junction of the floor and the stone floor during construction; the weather-resistant glue of the same colour as the floor should be filled in the joint to ensure that there is no gap at the junction and the transition is natural. Using masking tape to first position glue ensures that the width and straightness of the glue junction are constant, therefore avoiding contamination of the final result.
Respected at the base of the skirting, a gap of 8 to 10mm should be changed to suit the thickness of the stone or hardwood floor thereby guaranteeing a natural and elegant transition.
An essential component of interior design, the construction of the floor rubber board directly influences the service life of the floor rubber board and the beauty of the indoor environment. Base treatment, glue treatment, placing the floor rubber board and detail treatment constitute part of the building process. The base should be cleansed and the surface should not be sanded, peeling, dusty, hollow, oily, or rough to the touch once the base treatment is finished. Applying adhesive simultaneously from the base and the rear of the plastic floor block allows the glue surface to be laid even in non-stickiness. As you place the flooring board, make sure its surface is level and there is no gap at the seam. The intersection of the flooring board and the skirting line is handled in the thorough processing stage to guarantee attractiveness. The key elements are the hygienic dead corners, splicing treatment, and minimum standards. The base ought to be free of sand, flaking, dust, hollowing, oil stains, and roughness when touched. Laying blocks should call for two materials close together without obvious seams. Generally speaking, overlapping technique should cut the junction of the two material parts; so, pay great care to preserving a single cut. Usually the overlap is three centimetres. The skirting and the ground are laid as a whole to prevent the formation of joints and sanitary dead corners, so the link between them is made into an inner fillet.
By means of the above comprehensive building technique and key points, construction workers may better comprehend and master the fundamental links of stone floor construction, guarantee construction quality, and make exquisite and long-lasting stone flooring for indoor areas.