



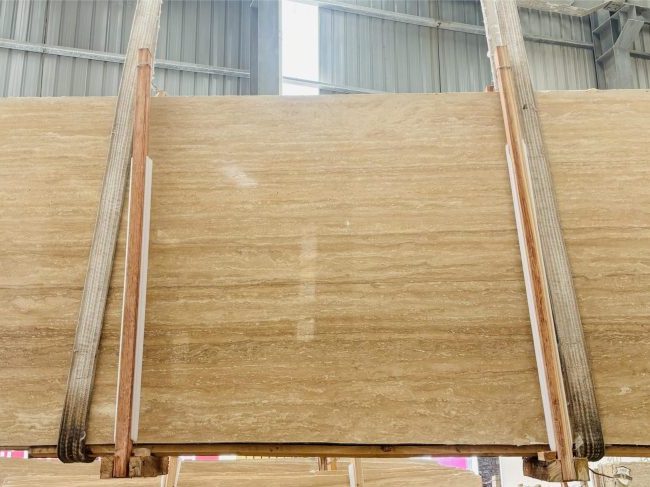


Wall Cladding Outdoor Stone hanging is a cutting-edge architectural decoration technique that involves attaching stones, such as marble, granite, limestone, and other similar materials, to the external or interior wall surface of a structure. This is done in place of the more conventional methods of mortaring or grouting, which involve mixing the stones with the wall. There is a significant contribution that this technology makes to the enhancement of the aesthetics, durability, and safety within buildings. The Wall Cladding Outdoor stone hanging system is able to establish structural independence by maintaining a particular distance between the stone and the primary structure of the building. This distance also helps to reduce the amount of damage that is caused by fluctuations in temperature or humidity within the wall. In most cases, the installation system is made up of steel sections (such as channel steel and angle steel) and stainless steel hangers. These hangers are attached to the wall using expansion bolts in order to create a sturdy frame structure. For the purpose of ensuring that the installation is both accurate and aesthetically pleasing, the Wall Cladding Outdoor stone is slotted on the edge or back and then attached to the support system using hangers. This allows for fine adjustments to be made in both the vertical and horizontal directions. Due to the fact that the Wall Cladding Outdoor stone is installed independently, it will be much simpler to do maintenance or repair in the future without having to remove the entire wall.


In addition, the stone hanging system needs to pay particular attention to the waterproofing and sealing treatment in order to prevent moisture from penetrating the stone or wall components and causing harm to them. In addition, Wall Cladding Outdoor stone dry hanging gives the impression of being clean and organised, and because all of the hangers and connectors are concealed behind the stone, the appearance of the structure is not altered in any way. Given that the Wall Cladding Outdoor stone is not influenced by the internal environment of the wall, it possesses a higher level of durability, particularly in conditions that are characterised by a harsh climate. The laying out of control lines, the laying out of stone layouts, the pre-arranging of stones, the driving of expansion bolts, the installation of steel skeletons, the installation of adjustment plates, the grooving of stones, the installation of stones, and the caulking of Wall Cladding Outdoor stone joints are all steps contained within the construction process. Because of its attractiveness, longevity, and ease of maintenance, Wall Cladding Outdoor stone dry hanging technology has become increasingly popular in contemporary architectural decorating. This is particularly true in high-end commercial buildings, hotels, office buildings, and residential construction projects.

1. Place Control Line
One of the crucial steps to ensure the accuracy and visual appeal of the project is the control lines taken during the Wall Cladding Outdoor stone hanging procedure. The crew will meticulously review the design drawings and utilise several measuring tools—including laser levels and distance meters—before starting to precisely estimate the installation area in line with the real situation that exists on the site. Following these guidelines, the staff will mark the control points on the wall and create unambiguous lines in both the vertical and horizontal directions based on the measurements. These guidelines will help the stone installation to operate as the reference standard. The lines are painstakingly scrutinised as soon as they have been laid out, and any deviations that have happened are corrected by the necessary changes. This is done to ensure that the characteristics of the site and the design criteria are totally compatible with the control lines. In order to maintain the consistency and symmetry of the Wall Cladding Outdoor stone, the control lines not only provide an exact reference for the installation of the stone but also help to identify and fix any problems that might develop on the site, such uneven walls. The following procedures directly affect the quality and impact of the Wall Cladding Outdoor stone installation: stone planning and laying out, pre-arranging stones, driving expansion bolts, building steel frames and other like activities. The basis for these later actions is these lines. Professionals monitor and check the line laying process to make sure every phase conforms with industry standards and project criteria. This makes very accurate stone placement possible, which enhances the appearance quality and lifetime of the construction.


2. Stone Layout Design For Wall Cladding Outdoor

A vital first stage in the stone dry hanging procedure is stone layout and design. Every Wall Cladding Outdoor stone must be exactly placed on the wall in line with its size and configuration. This stage calls not only exact technical operations but also the whole aesthetics and functionality of the stone to guarantee that the final installation effect satisfies the design criteria and displays the inherent beauty of the Wall Cladding Outdoor stone. Every stone’s size needs to be verified to make sure they fit the design designs before the lines are laid out. This helps to guarantee the precision of Wall Cladding Outdoor stone layout and design. Then, based on the design drawings and the actual size of the stone, ascertain the stone’s arrangement—horizontal, vertical, or mixed—as well as the stone’s spacing and alignment between each other. Pay particular attention to the joints and edge treatment between the stones while planning the lines to guarantee that the width of the joints and the form of the edges match the general design so guaranteeing the final visual impact and structural integrity. Furthermore, the Wall Cladding Outdoor stone layout and design have to consider the interaction with windows, doors, columns, beams, and other architectural features to guarantee that the arrangement of the stone does not compromise the function of these elements, thereby guaranteeing the general aesthetics as well. To find whether the colour, texture, and size of the stones satisfy the design criteria, replicate the real wall arrangement on the ground and pre-arrange the stones and make required corrections.


Mark the precise place of every stone on the wall using professional layout instruments as ink fountains, scribers or laser projectors. These lines will act as a manual while laying the stone. Simultaneously take into account how light affects the stone’s colour and texture. Different light circumstances may affect the colour and texture of the Wall Cladding Outdoor stone, hence these elements should be taken into account while designing to guarantee the consistency of the resultant appearance. A quality check follows the completion of the layout to guarantee every line clarity and accuracy. Any departure must be repaired in time to prevent issues during the next installation phase. Stay in contact with the design team throughout the layout phase to make sure the layout satisfies the design goal and promptly solves likely issues. By means of precise Wall Cladding Outdoor stone layout and design, one can guarantee the seamless development of the stone dry hanging project and establish a strong basis for the ultimate decorative impact. This stage is absolutely essential for the whole dry hanging procedure since its correctness and diligence immediately influence the quality and attractiveness of the Wall Cladding Outdoor stone installation.


3. Mounting Frame Material

The installation of expansion bolts, steel skeletons, and adjustment plates forms the three most crucial steps in the stone hanging procedure. These actions help to guarantee the accuracy and stability of the Wall Cladding Outdoor stone construction. Marking the steel skeleton’s fixing sites on the wall in line with design criteria and control lines comes first in the installation of expansion bolts. These pre-selected locations then have holes bored in them from which expansion bolts are placed. These bolts expanding into the concrete or brick wall offers a strong basis for the steel skeleton to be fixed to. This guarantees the stability of the steel skeleton and the bearing capability to manage the weight of the stone together with any possible environmental influence. Following the position and control line of the expansion bolts, welding or bolting steel sections—such as channel steel and angle steel—forms the frame structure during the installation of the steel skeleton. One does this in line with the installation protocol. To ensure the stability and lifetime of the whole project, this steel skeleton—which forms the main supporting framework for the stone—must be built in exactly accordance with the design criteria and safety standards.

At last, during the last stage of the process—that of installing the adjustment plates—adjustment plates are positioned on the steel skeleton. One might also refer to these as hangers or support plates. They not only help to secure the stone but also enable one to adjust the location of the stone such as to ensure the accuracy and appeal of the installation. Using adjustment sheets allows one to make minute changes to the stone installation to ensure that the final appearance is perfect and to allow for small changes that might happen on the site. These three processes are absolutely necessary for the stone dry hanging technique to run as it should. Their combined activities help the stone to have a strong, flexible, and solid support system. This assures great quality and safety of the stone dry hanging project.
4. Final Installation Steps


Regarding stone dry hanging technology, the phases of stone slotting, stone installation, and stone caulking are absolutely vital ones that must be followed to guarantee that the project is of great quality and looks appealing. Accurate slotting of the rear or side of the stone in line with the stone’s installation method is known as slumping stone. One further name for slotting stone is stone preparation. This is carried out to ensure the stone can be securely fastened to the adjusting plate. This method requires very great degree of accuracy since the size and position of the slot are highly related to the stability and general beauty of the stone. This is thus because the general appeal of the stone depends much on the slot. After the stone is installed, the pre-arranged stones are connected to the steel skeleton in line with the position of the line using the hanger. Using specialist instruments like a level and a plumb bob helps to guarantee that every stone is aligned in both the horizontal and vertical planes. Finish the stone wall during this stage if one is to reach the desired degree of neatness and synchronisation. The conclusion claims that once the installation is finished, stone caulking is a crucial connection that has to be finished. First carefully cleaned, the crevices between the stones must then be filled using specialist caulking materials, including marble adhesive or a caulking agent designed especially for that use. This cycle has to be kept going until the spots are totally occupied. The surface is completely polished and cleaned just after the caulk has been applied to guarantee uniform colour and smooth gaps. This is done to reach success in order to produce not only gorgeous but also long-lasting effects. By means of these three stages taken together, the stone hanging project will be completed in a high-quality manner, so improving the stability and durability of the structure as well as adding to its beauty of the building.