


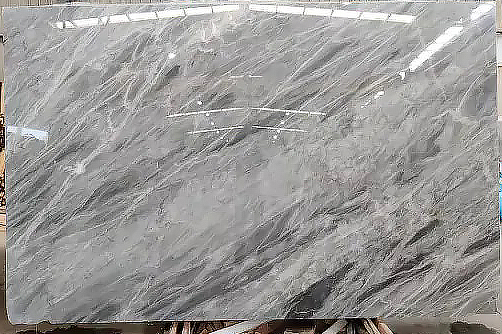


Sintered stone is a new kind of building material derived from stone that has been ground. Another variation on sintered stone is sintered stone. It is not only aesthetically pleasing but also performs remarkably well, which has drawn a lot of interest in many other sectors, including the interior design business, the home goods sector, and the building sector. One relatively recent kind of stone with a great spectrum of uses is sintered stone. Its manufacture makes use of natural minerals as the raw components. These comprise natural stone powder, feldspar, quartz, clay, kaolin, and other like elements. It is produced using advanced techniques combined with more than 36,000 tonnes of presses, NDD inkjet technology, and subsequently high temperature firing at more over 1200 degrees Celsius. Product firing comes next in this procedure. The substance exhibits many remarkable physical characteristics like high degree of hardness, resistance to high temperatures, scratch resistance, anti-penetration, and resistance to acid and alkali. Should you be seeking sintered stone, you have a wide range of options from 1000x 3000mm, 1200 x 2700mm, 1800 x 900mm, and many more from specs and thicknesses. Sintered stone is appropriate for use in many different applications since its thickness can vary from three millimetres to twenty millimetres.

Among these uses are surface for furniture, electrical panels, wall and floor beautification, and like others. Rock slabs offer eight benefits above more conventional materials. These benefits include the fact that they are safe and hygienic, that they are resistant to fire and high temperatures, that they are resistant to stains, that they are resistant to scratches, that they are resistant to corrosion, that they are easily washable, that they can be applied in all directions, and that they can be customised in a variety of different ways. Apart from being absolutely recyclable, they are non-radiative, non-radiating, and devoid of any dangerous elements. They enable direct food interaction. The type of rock slab will affect its density—between 2.6 and 2.8 grammes per cubic centimetre; its compressive strength will vary from 100 to 300 megapascals; its bending strength will vary from 10 to 30 megapascals; and its water absorption will vary from 0.1 to 0.5 percent. Ecologically benign raw materials and techniques are applied throughout manufacture. Furthermore a good candidate for recycling is the product itself since it is pollution-free and beneficial to the environment. As a premium, environmentally friendly building material product, rock slabs will find increasing market demand. This need will grow as home décor keeps getting better in quality. Time will pass and this need will keep developing. Rock slabs have been the most often used choice in the market for building materials because of its amazing performance, wide range of application sectors, and one-of- a-kind material features. This not only enhances the visual attractiveness of buildings and houses but also their usefulness and lifetime.


1. Design
Establishing a clear design strategy is the first absolutely essential stage in building and making a rock slab background wall. Designers must interact closely with clients to gain a thorough awareness of their aesthetic tastes, practical needs, and economical limitations. This knowledge then serves as the basis for deciding the precise design concept for the TV background wall. First, the designer will carefully consider the needs of the customer, including the background wall’s proportions, form, and placement as well as its synchronisation with the general style of interior design. The designer will also examine the placement of the television, the living room’s lighting, and furniture arrangement. Regarding material choice, the designer will then choose a type of rock slab depending on the features of the slab and the customer’s budget. While considering the price variations between rock slabs of different manufacturers and thicknesses, the designer will also take into account the qualities of the rock slab, which comprise its longevity, low maintenance, and environmental protection.

Talking with the client about and deciding the desired impact of the background wall falls to the designer as well. This covers the wall’s general style, colour, texture, glossiness. This can call for choosing cutting, grinding, and surface treatment of the rock slab among other methods. The designer meticulously plans the particular arrangement of features including rock slabs, wooden grilles, light strips, and wall lamps during the design draft. The designer also chooses the splicing technique for the rock slabs, the wooden grille layout, the light strip routing, the Sintered Stone wall lamp placement and count. Rendering manufacturing is a necessary link during the stage of design scheme creation. Using software meant for 3D modelling allows designers to create realistic visual effects so that clients have a complete awareness of the final background Sintered Stone wall.


Following the completion of the renderings, the designer will interact with the client in great detail, explain every and every element of the design scheme, and make any required changes depending on client comments to ensure that the final design will be able to meet client expectations. To ensure the practicability and safety of the construction process, the designer is also obliged to consider several technical aspects including the way of securing the rock slab, the technique for installing the wooden grille, the concealment of the light strip and the power wiring, and so on. Ultimately, depending on the design concept, the designer generates a thorough cost budget. This budget considers various expenses such transportation, labour, supplies, and tools. Furthermore, the designer provides clients with a clear estimate sheet to guarantee that they fully grasp the investment they are making in the project.
Following the above described processes will help the designer to guarantee that the design and installation project of the rock slab background wall has a defined direction and objective from the very beginning. This will lay a strong basis for the later building that will take place. This not only increases the project’s success rate but also ensures that the customer is happy, produces a lovely and practical rock slab background wall, and improves the general attractiveness and usability of the house.
2. Framework Confirmation
Making the base of the background Sintered Stone wall follows next once the design of the rock slab background wall is finalised. This base is a necessary link guaranteeing the durability and stability of the whole backdrop wall. During the wood shingle stage, the building crew will choose the correct materials to build the frame of the background wall. These components will be selected in compliance with the precise measurements and specifications specified on the design blueprints. Usually, OSB or wood board is the material of choice for building the base since of its strength and stability.

The construction staff will first find the frame on the wall then use highly accurate measuring instruments to verify the location, therefore ensuring that the frame is positioned appropriately. The building of the frame must be done in such a way that it exactly matches the blueprints. This will ensure that every component can be exactly matched, so providing a strong framework for the rock slab installation. Those in charge of the base have to make sure it is both horizontally and vertically aligned throughout this stage of the building process. This is a crucial stage in avoiding the later installation being mistakenly orientated. Any deviation could cause the rock slab to be uneven, which will affect the structural safety as well as the general appeal.
The carpenter must provide particular attention to every last detail throughout the building process to ensure that the frame’s curves and measurements exactly match those shown in the design drawings. If any dimensions mismatch is found during the on-site measurement phase, it is absolutely necessary to take quick care of it to avoid more major problems in subsequent operations. To achieve this, carpenters must have not just great ability but also a painstaking attention to detail.

It is also crucial to consider the fastening technique that will be applied for the backdrop wall base throughout building. Usually, expansion bolts or specialised wall anchors are used to fasten the base to the wall so ensuring its dependability and stability. Construction workers must consider the material and load-bearing capacity of the wall during the fixing process to choose the most appropriate fixing technique.
Once the base frame is built, the construction crew has to do a series of inspections and tests to make sure the base meets the criteria for its bearing capacity and stability. Along with tensile testing conducted on the anchoring points, this could cause retesting of the horizontal and vertical levels of the base. The installation of rock slabs shall proceed as follows only once all the tests have been passed with perfect results.
Moreover, the exact and highly technological manufacturing of the background wall base strongly relates to the quality and service lifetime of the whole rock slab background wall. Basically, the background wall base should be generated. By means of strict construction management and fine control of details, one can guarantee that the fabrication of the backdrop wall base fits the design criteria and lays a strong basis for the later installation of the rock slab.
3. Reserve Wire Position


Ensuring the operation and safety of the rock slab background wall depends mostly on reserving the wire positions during its construction. Based on the thorough design drawings, the electrician precisely finds the position, quantity, and height of the sockets to satisfy the needs of electrical equipment next to the TV and to be in harmony with the general interior design. While other plugs may be placed at a lower position to supply power for equipment such audio and game consoles, the TV socket is typically set in the socket design at a height of roughly one metre from the ground. The electrician reserves enough wires at the site of the light strip installation to enable the flexible change of the length and position of the light strip during subsequent installation. Usually, this entails setting aside a specific length of wire within the wall such that the end of the wire has sufficient length to link to the controller or power source. Should the design call for a transformer, the electrician must also designate the location of the transformer and make sure the wire’s length from the transformer to the light strip is suitable to prevent either too long or too short effects on the appearance or too difficult installation conditions.

Another great factor is the wire laying technique. Relating to the safety of the wires and future maintenance and repair, the electrician might decide to groove the wires into the wall or use wire tubes to protect them. Electricians must follow local electrical safety guidelines and standards, make sure that wire specifications satisfy load requirements, use suitable terminal blocks, and guarantee that all wires are properly grounded to avoid electrical fires and electric shock events when reserving places for wires. The electrician will do initial tests to make sure all sockets and reserved wires are operating as they should free from bad contact or short circuits once the wires are reserved. This is the secret to guarantee the whole background wall electrical system operates safely and steadily. The electrician keeps regular contact with the designer throughout the process to guarantee that the electrical layout satisfies the particular needs of the client and conforms to the general design plan. The processes of reserving wire placements can guarantee that the electrical system of the rock slab backdrop wall is both beautiful and safe, fits the needs of modern dwellings, and creates a strong basis for next installation activity by means of exact design and competent construction.

The location of rock slabs is one of the project’s most crucial considerations. Following the appointment for on-site measurement, the model, size, and installation plan of the rock slab are decided in line with the prevalent conditions at the site. Usually, the installation process makes advantage of the glueing method. This approach entails first directly bonding the rock slab to the hardwood base after glues have been applied on its opposite side. The socket holes and light holes must be pre-drilled as requirements for the rock slab installation.
The wooden grille can be implemented just after the rock slab is installed. Apart from adding to the idea that the background wall is three-dimensional, the wooden grille also contrasts material and colour with the rock slab, therefore improving the layering of the space at the same time. The whole background wall is shown once the wall lamp and the wooden grille have been installed.