


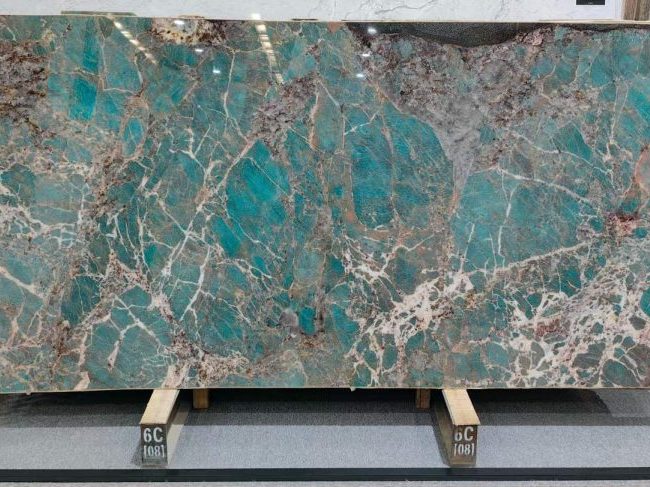

Rock slabs have transformed how we approach materials in the field of modern building and architecture by combining the elegance of natural stone with the accuracy of contemporary manufacturing processes. From basement slabs with rock on the edge enhancing structural integrity to landscaping rock slabs adorning outdoor areas, rock slabs have become a pillar of modern architecture. From home to business, interior to exterior, their adaptability and durability make them a preferred choice for many kinds of projects.
The 45° seamless splicing procedure is among the most developed methods for handling rock slabs. In situations where the appearance of the material is equally vital as its functional qualities, this approach is absolutely essential for obtaining a perfect, continuous look. We examine how 45° smooth splicing improves the utility and attractiveness of rock slabs in several uses below, following the complete six-step process.
Step 1: 45° Cutting
The journey of seamless splicing begins with the 45° cutting process. This step is fundamental when working with rock slabs because it sets the foundation for a perfect joint. Whether you’re dealing with big slabs of rock intended for large-scale applications or black rock slabs used in sleek, modern interiors, the precision of the 45° cut is non-negotiable. The angle must be exact, and the cut must be smooth and even. This precision ensures that the rock slabs will fit together seamlessly, creating a flawless, uninterrupted surface.

For example, when fabricating rock slab steps or countertops, the cut needs to be so precise that, once joined, the seam is virtually invisible. This is particularly important in applications involving brown limestone slab rock or black rock slabs, where any irregularity in the cut would disrupt the uniformity of the material’s natural pattern and color.
Step 2: Processing Before and After Splicing
After the initial cutting, the next critical phase involves processing the edges of the slabs before and after splicing. This step is vital to ensure that the edges are perfectly prepared for joining. In projects where slabs of rock need to meet without any visible seam, such as in cave-selected rock slabs used for high-end architectural features, edge preparation is crucial.
The process typically involves machine grinding, which, while precise, can leave small imperfections on the edges. To correct these, manual secondary grinding is conducted to ensure the edges are perfectly smooth and ready for seamless splicing. This meticulous attention to detail is what makes the difference in high-quality installations, whether you’re working with black rock slabs or brown rock slabs for house exteriors.

Step 3: Pasting
Once the edges are prepared, the next step is the pasting process. This stage is where the rock slabs are actually joined together. Before pasting, the slabs are thoroughly cleaned to remove any dust or debris, ensuring a strong bond. The rock slabs, whether they are brown limestone slab rock boxes or big slabs of rock for outdoor features, are then positioned using specialized clamps that maintain alignment during the adhesive application.

The choice of adhesive is critical. Professional-grade rock slab glue is injected into the seams to bond the slabs together securely. For materials like carbon rock slabs or black rock slabs, which are often used in high-visibility applications, the adhesive must be strong enough to hold the slabs together without allowing any visible gap or seam. After applying the adhesive, cloth tape is used to pull the slabs tightly together, enhancing the seamless effect. The assembly is then left to set for several minutes, allowing the adhesive to begin curing. During this time, any excess glue that seeps out of the joint is carefully removed to maintain the clean, flawless appearance that seamless splicing is known for.
Step 4: Surface Treatment
The surface treatment phase starts once the glue has had time to cure. This stage is absolutely essential for perfecting the slab junction so that it is not only strong but also aesthetically flawless. Any extra adhesive is carefully ground away at a precise 45° angle using tools including sponges, angle grinders, and sandpaper, therefore preserving seam integrity.
Materials like black rock slabs or cement slab rock should especially be handled carefully to prevent grinding and harming the surface glaze. The aim is to smooth down the glue so that it fits perfectly with the rest of the granite slab, therefore eradicating all evidence of the junction. The grinding is painstaking and requires an experienced touch; the instant a crisp sound is heard, indicating that the adhesive is level with the rock surface, the grinding must cease to prevent over-polishing, which can harm the finish.
Finally, any remaining excess adhesive is scraped away with a fine blade, and the surface is polished using a high-grit grinding disc, typically no less than 1000#. This polishing not only ensures a smooth finish but also enhances the natural beauty of the rock, making the joint virtually invisible.
Step 5: Reinforcement and Waterproofing
With the surface treatment complete, the next phase is reinforcement and waterproofing. This step is essential for ensuring the long-term durability of the rock slab installation, particularly in environments where the slabs will be exposed to stress or moisture. For instance, when working with bathroom basins or wash basins crafted from rock slabs, waterproofing is a critical consideration.

Reinforcement involves the use of special edge strips or corner codes to strengthen the adhesive joints from behind. This reinforcement is especially important in applications like big rock slab leak repair, where structural integrity is paramount. Waterproof adhesive strips are applied along the back of all joints, providing an additional layer of protection against moisture. To further reinforce the joints, a commonly used structural adhesive is applied over the waterproof strips, creating a secondary bond that enhances both strength and stability.

Step 6: Treatment in Antifouling
Application of an antifouling chemical comes last in the 45° seamless splicing process. Maintaining the rock slabs’ perfect look over time depends on this treatment, particularly in high-use areas where the slabs could come into contact with dirt, stains, or other pollutants. Whether it’s black rock slabs used on a kitchen island or brown limestone slab rock in a busy area, the antifouling treatment helps to keep the surface appearing fresh and clean.
Carefully sprayed to all joints, the antifouling agent forms a protective barrier, keeping dirt and grime out of the seams. This not only maintains the cleanliness of the joints but also increases the general lifetime of the rock slab installation, therefore guaranteeing that it will remain aesthetically pleasing for years to come.

The Broader Application of Rock Slabs
The use of rock slabs in construction and design goes far beyond just their physical properties. Their application ranges from the highly functional—like basement slabs with rock on the edge—to the purely aesthetic, such as landscaping rock slabs that add a touch of natural beauty to outdoor spaces. In both cases, the seamless splicing technique is key to achieving a finished product that is both durable and beautiful.
For large-scale projects involving large slabs of rock, the precision and care required in the 45° seamless splicing process ensure that these materials not only fulfill their functional role but also enhance the visual appeal of the entire structure. This meticulous process, when applied to black rock slabs or carbon rock slabs, can transform these materials into the centerpiece of a design, whether they’re used in a residential, commercial, or industrial setting.
In addition, specialized applications, such as cave-selected rock slabs or brown limestone slab rock boxes, benefit immensely from the seamless splicing technique. These unique materials, with their distinct textures and colors, require careful handling and expert craftsmanship to ensure that their natural beauty is preserved and showcased to the fullest extent.
Conclusion
The 45° seamless splicing operation for rock slabs is more than just a technical process; it is a craft that combines precision, artistry, and an understanding of the material’s unique properties. Whether used in the construction of rock slab steps, the creation of sleek, modern surfaces with black rock slabs, or the enhancement of outdoor spaces with landscaping rock slabs, this technique allows for the full potential of rock slabs to be realized.
By following the detailed six-step process—from 45° cutting to antifouling treatment—builders and designers can achieve seamless, durable, and aesthetically pleasing results that stand the test of time. The widespread use of rock slabs in modern construction not only elevates the tactile and visual quality of spaces but also provides endless creative possibilities for those who understand and appreciate the nuances of this remarkable material.
These steps highlight the precision and care required in working with everything from large slabs of rock to delicate brown rock slabs used in residential settings. By following these meticulous procedures, integrity and appearance are preserved, ensuring a flawless, durable, and aesthetically pleasing finish.