


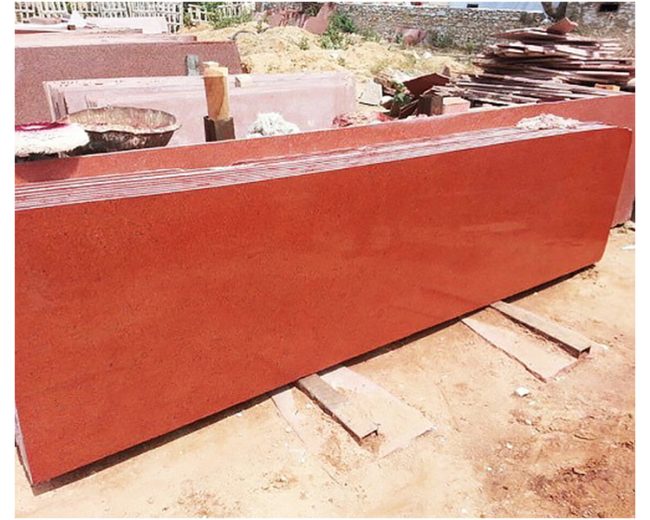

Jeśli chodzi o wystrój blatów kuchennych, jest to jedna z najczęściej wykorzystywanych przestrzeni. Estetyczny wygląd i użyteczność otoczenia bezpośrednio zależą od projektu i konstrukcji blatu. Blat kuchenny musi nie tylko estetycznie pasować do ogólnego stylu wnętrza, ale także wytrzymywać codzienne obciążenia związane z gotowaniem i czyszczeniem. Dlatego każdy, kto zajmuje się urządzaniem wnętrz, powinien zwrócić uwagę na takie kwestie, jak zdobycie wiedzy o standardowych praktykach dotyczących blatów kuchennych oraz wybór rozwiązania projektowego odpowiadającego specyficznym potrzebom. Ten artykuł przedstawia pod trzema różnymi kątami – przednią krawędź zwisającą blatu, zabezpieczenie przed wodą przy ścianie oraz umiejscowienie zlewu – szczegółowo omawia powszechne praktyki dotyczące blatów kuchennych. Wpis zawiera również przykłady z rzeczywistego życia, które pomogą wszystkim podjąć bardziej rozsądne decyzje dotyczące modernizacji kuchni.


1. Umieszczenie przedniej krawędzi zwisającej blatu: dwie najczęściej stosowane techniki łączone razem
Umieszczenie przedniej krawędzi zwisającej blatu jest jednym z najważniejszych elementów projektowania kuchennego blatu. Wpływa ono nie tylko na atrakcyjność wizualną blatu, ale także na jego wygodę i wodoodporność w trakcie użytkowania. < Do uzyskania położenia przedniej krawędzi zwisającej można stosować dwa główne podejścia: pierwsze polega na ugięciu krawędzi dokładnie pod kątem 45 stopni; drugie – na dodaniu niewielkiej powierzchni łukowej opartej na zawieszeniu 45 mm. Obie te techniki są uważane za najczęściej stosowane. Pierwszym podejściem jest wykonanie fazowania poprzez cięcie krawędzi blatu pod kątem 45 stopni. Jest to pierwsza technika. Dzięki temu prostemu i szczodremu rozwiązaniu budowa nie jest zbyt skomplikowana. To nawyk naprawdę powszechny w dzisiejszych czasach. Poza wyglądem, skośna forma pod kątem 45 stopni skutecznie zapobiega rozprzestrzenianiu się plam wody wzdłuż blatu na dolne szafki czy podłogę i działa jako pewne narzędzie wodoszczelności. Nowoczesne minimalistyczne blaty kuchenne, które mogą zapewnić prosty i spójny wygląd, są szczególnie odpowiednie dla tego podejścia. Drugim podejściem jest budowa niewielkiej zakrzywionej powierzchni umieszczonej samodzielnie na zewnętrznej krawędzi, opartej na zawieszeniu 45 mm. Bardziej humanitarne rozwiązanie zakrzywionej powierzchni lepiej zapobiega spływaniu plam wody na podłogę czy szafkę, co wzmacnia wodoodporność szafek. Jednak budowa tego projektu jest nieco trudniejsza, a koszty są uznawane za nieco wyższe. Chociaż ta metoda jest teraz stosowana przez niewielką liczbę osób, jej unikalne walory projektowe stopniowo przyciągają coraz więcej dekoratorów z najwyższej półki. Zakrzywiona powierzchnia nie tylko sprawia, że blat staje się bardziej atrakcyjny, ale także podkreśla perfekcję detali, co jest idealne dla właścicieli, którzy chcą prowadzić wysokiej jakości życie.
2. Lokalizacja zabezpieczenia przed wodą przy ścianie znajduje się poprzez zastosowanie dwóch różnych technik budowlanych.

Innym ważnym czynnikiem, który należy wziąć pod uwagę przy projektowaniu blatu kuchennego, jest umieszczenie zabezpieczenia przed wodą względem ściany. Oprócz utrzymywania ściany suchej i czystej, zabezpieczenie przed wodą pomaga zapobiec rozlanym plamom wody na powierzchni ścian. Ogólnie rzecz biorąc, istnieją dwa powszechne sposoby umieszczania zabezpieczenia przed wodą przy ścianie: pierwszy polega na stworzeniu łukowej powierzchni przejściowej między taśmą zabezpieczającą a blatem; drugi – na zamontowaniu taśmy zabezpieczającej po ułożeniu blatu. Obie te techniki są uważane za powszechne. Pierwsza metoda wymaga montażu taśmy zabezpieczającej osobno po ułożeniu blatu. Ta technologia ma jedną zaletę: projekt jest dość elastyczny i nie wymaga dużej powierzchni blatu. Taśma zabezpieczająca zostaje dodana później, dzięki czemu można ją dostosować do rzeczywistego stanu na miejscu, aby upewnić się, że blat i taśma zabezpieczająca idealnie dopasują się do siebie. Niemniej jednak nierówności płytek ściennej spowodują widoczne zmiany w przestrzeni między taśmą zabezpieczającą a ścianą, co wpłynie na wygląd. Po zakończeniu prac należy wykonać obróbkę pięknościową, jeśli chcemy poprawić całość wyniku w tym etapie. Obróbka pięknościowa, oprócz pokrycia szczeliny, może również zapobiec przenikaniu plam wody i przedłużyć żywotność taśmy zabezpieczającej. Druga metoda polega na zaprojektowaniu łukowej powierzchni przejściowej pomiędzy blatem a taśmą zabezpieczającą. Przed dostarczeniem na miejsce taśma zabezpieczająca i blat muszą być ze sobą połączone już w produkcji. Obie atrakcyjne cechy tego projektu to jego doskonałe poczucie ogólne i duża wartość estetyczna. Łukowa powierzchnia przejściowa może skutecznie zapobiec pojawianiu się plam wody na ścianie, gdy woda tam się rozpryskuje. W porównaniu z innymi podejściami, ta metoda wymaga bardzo dokładnych wytycznych dotyczących pomiarów, zamówień, obróbki i montażu na miejscu. Jakiekolwiek problemy w dowolnym z połączeń mogą spowodować szczelinę między blatem lub ścianą a taśmą zabezpieczającą, co wpłynie na funkcjonowanie wody. To wyjaśnia, dlaczego większość domów dziś korzysta z pierwszej metody zabezpieczenia przed wodą. W rzeczywistej budowie niezbędne jest wybranie zespołu budowlanego z doświadczeniem oraz przeprowadzenie kompleksowej analizy rozmiarów przed montażem. To gwarantuje, że taśma zabezpieczająca idealnie dopasuje się do ściany i blatu.
3. Gdzie powinien być umieszczony zlew? Trzy powszechne metody projektowania

The most crucial practical element of the kitchen countertop is the sink, hence its placement and design directly affect the time spent in the kitchen. Three popular design techniques for sink placement exist, each with benefits and drawbacks of their own. The sink is pushed on the countertop first; second, the sink and the countertop are essentially flush; third, the sink is bonded under the countertop. Every one of these three approaches has its benefits and drawbacks. The first method is laying the sink on the countertop. The sink’s exterior edge is raised above the countertop, therefore producing a clearly evident gap. Some of the benefits of this idea and application are simple construction, low cost, and a connection that is really strong between the sink and the countertop. On the other hand, this approach clearly has disadvantages: it is difficult to clean as the area between the sink and the countertop allows dirt and grime to hide rather easily. Furthermore, water marks on the countertop are challenging to transfer to the sink, and user experience is rather less than ideal overall. This method is hence suitable for homes with low cleaning needs or limited financial means. Second, you could design the sink so it is almost entirely flush with the countertop or so it is one to two millimeters below the surface. This design is quite beneficial since it leaves the area between the sink and the countertop on the plane, as such. The general impression is more beautiful when the seam treatment is done, and the water stains on the countertop may flow fast to the sink, which facilitates cleaning. Still, this approach requires great construction accuracy, hence it’s crucial to make sure the countertop and sink are both level and fit together. For homes that value both appearance and utility, this method is suitable and could improve the general state of the kitchen. Leaving the space under the countertop, the third method entails gluing the sink to the countertop on its bottom. Designed this way, the counters are flatter, simpler to clean, and have better general appearance. This design offers certain benefits. Concealed under the countertop is the area between the sink and the countertop. This makes it challenging to hide dirt and grime as well as provide the optimum user experience. Conversely, this method has several disadvantages as well: it is costly, complex to build, and has strict standards for the strength of the countertop material to ensure the sink will be solid. This method is suitable for high-end decoration and could create an evocative and simple kitchen countertop environment.


4. Real investigation of the matter and suggested responses

To help us better grasp the usual processes followed for kitchen countertops, let us review a few actual cases. First of all, the owner decided on a simple 45-degree angle hanging edge style. This design fits the sink installation approach used above-the-counter basin. This design not only helps to lower costs but also follows the rules of the contemporary minimalist approach of home décor. Conversely, the owner found it more challenging to clean since the area between the sink and the countertop is more prone to get soiled. This was found while the sink was running through. In the second situation, the owner chose a design with a curved surface hanging edge that fit the basin installation technique applied for the middle basin. Apart from its appearance, this pattern improves the countertop’s waterproof ability, therefore enabling water stains on it to flow naturally down into the sink. The owner is rather happy with the use impact produced even if the building expenses are somewhat more. For the third case, the owner chose a lavish under-the-counter sink design and matched it with a water-retaining strip with a circular transition surface pattern. The way the kitchen countertop is designed not only improves the general state of the area but also facilitates cleaning it. Nevertheless, the owner took great caution while choosing the construction team and finally decided to go with an experienced and competent team since of the great degree of complexity involved in the building process.

These actual cases make it abundantly evident that the design and construction features of the kitchen countertop directly affect the appearance and the user experience with the countertop. Regarding countertop design, it is advised that the owner choose the design scheme most suitable for them depending on their personal needs, financial situation, and preferred kind of decoration. Concurrent with this is advised that a thorough size evaluation be conducted before to installation and that an experienced construction crew be chosen throughout the building process. This ensures that every element gets the greatest possible outcome.
5. Finally: Choose a countertop design fit for your requirements.
If we have a thorough awareness of the standard practices of the front hanging edge of the countertop, the wall water retention, and the sink placement, we will be able to choose the design scheme that is most appropriate for our needs and financial constraints. Both the aesthetics and the utility of the kitchen are directly impacted by the design and construction elements of the countertop in the kitchen countertop. Every technique offers benefits unique from one another, whether it is a simple and large hanging edge at a 45-degree angle or a flexible and practical above-the-counter basin design. Every each element has to be painstakingly controlled during building. Every single action, from cutting the countertop to installing the water retaining strip, then all the way to sink fixing, must be painstakingly created. By doing this, we can only guarantee that the kitchen countertop reaches the best outcomes in terms of both its utility and its attractiveness. This will result in long-term comfort and quality in the house life of the owner.